Conserving and Restoring Church Hatchments
Francis Downing
 |
|
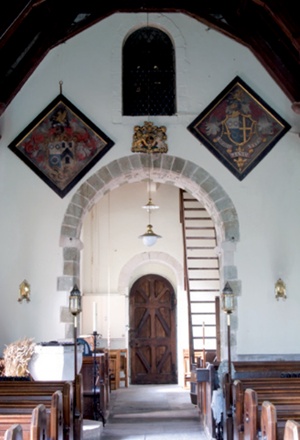
| Two hatchments hanging on the west wall of the church of St Michael, Wilsford cum Lake, Wiltshire: one commemorates Robert Duke, who died in 1749, and the other his son, who died in 1793. The carved arms in the centre are those of George III. |
The churches and chapels of the United Kingdom are home to countless symbols of religion, wealth, power and history. None, however, are quite as distinctive and yet as little known as the hatchment. As a record of a church’s past parishioners, hatchments are as significant as inscribed plaques or gravestones, but they can also give a far deeper insight into the history of a parish. Hatchments are an invaluable resource for those interested in researching the history of distinguished local families, both surviving and extinct, and can provide a first step to uncovering a dynasty’s history.
However, knowledge slips between the cracks of old and new generations, and few contemporary parishioners and church visitors realise the significance of hatchments or know which family they represent. For many, the sight of one of these unusual artefacts hanging in a church signifies nothing more than an archaic memento of a long-forgotten benefactor to the parish. They are often fixed high up where their detail cannot be fully appreciated, and they are easily forgotten. Here they are vulnerable to damp conditions and leaking roofs, and these once vibrant pictorial chronicles of our history often deteriorate where they hang, masked by dirt and discolouration, their paint left to flake away.
Hatchments are armorial shields painted onto a square- or ‘lozenge’-shaped frame. (In heraldry, the term ‘lozenge’ describes a diamond or rhomboid; its four sides are all equal but its angles are not square.) The background is painted sombrely in black, and occasionally skulls and crossed bones adorn the frame, often with skulls painted on the arms itself. Once granted as a reward for an act of bravery or distinction, the term hatchment is believed to be a corruption of the word ‘achievement’. The tradition of hanging these armorial shields or escutcheons in churches goes back to the 17th century and its roots extend further back still to the time when the family of a dead knight would display his helmet and shield in the church or family chapel. In those days, when a nobleman died his heraldic shield would be carried before the coffin.
From the early 17th century the practice of creating a funeral banner developed. The arms, helmet and crest of the deceased nobleman would be painted on rough canvas, hessian or calico, usually about three to four feet square and this was sometimes carried during the funeral procession. Smaller hatchments were sometimes painted on wood panels.
 |
|
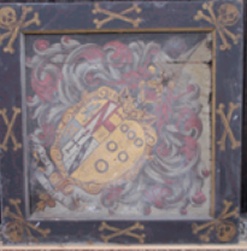
| An 18th century hatchment in the church of St Luke, Widnes, Lancashire: the dexter side (on the left when viewed from the front) is black and the sinister side is white, indicating that it was the husband who had died. |
The background to the shield or ‘escutcheon’ was often painted black and white to indicate whether it was the husband or wife who had died. If the right or dexter side was black and the left or sinister side was white, then it was the nobleman himself who had died leaving a widow. However, if the sinister side was black and the dexter side was white, then it was the wife who had died, pre-deceasing her husband.
The hatchment might bear the family motto but more commonly it spoke of resurrection in the afterlife, bearing the legend Resurgam (‘I will rise again’).
The painted fabric would be tacked to a flat wooden frame, usually black, and displayed outside the family home. Following a suitable period of mourning, probably lasting up to 12 months, the hatchment would be removed and hung inside a church with which the family were likely to have had some connection, either as parishioners or benefactors.
As the years passed and the family married out, sold off their property to pay debts, or simply died out, the origin and ownership of the hatchments were almost invariably lost. Some hatchments have been removed and placed in storage. Others have been disposed of as symbols of bygone generations that have ceased to be relevant or meaningful. In spite of this, it is still sometimes possible to trace a hatchment’s family connection to living descendants and quite often the family connection with the area may not be completely severed but survives under a variation of the original name.
CONSERVATION ISSUES
Along with other paintings, the conservation and restoration of hatchments has been carried out at my studio for over 30 years and while each hatchment is unique, all have presented similar problems.
As stated, hatchments were usually created by painting the arms on to rough canvas, hessian or calico. The artist would normally prime the canvas before drawing out the design and then painting over it (although there are many examples of unprimed hatchments, too). In normal ‘easel’ painting the picture would be varnished some six months to a year after completion, but of course there are many cases where this was never carried out on hatchments, leaving the paint unprotected and often allowing bloom to develop in damp conditions. The fact that the canvas was simply tacked to the back of a flat frame and then hung against what was often a damp wall, created further problems such as oxidation of the tacks and rotting and tearing of the canvas.
 |
 |
||
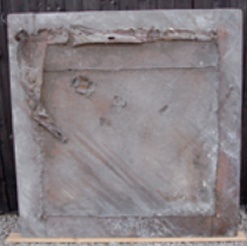
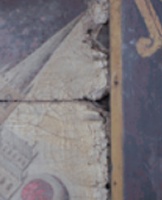
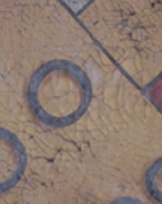
| An early 18th century hatchment at St Michael the Archangel, Kirklington, N Yorks: the front and rear of the hatchment before restoration (above) with details (below left) showing the edge of the hatchment pulling away from the frame and the flaking paint surface). | |||
Apart from the collection of dirt and the discolouration of any varnish layer, the canvas support was prone to shrinkage, exacerbated by damp and variable conditions. As a canvas shrinks, the dry paint cracks and there is a danger of flaking. Further dirt becomes compounded between the cracks making flaking even more likely.
In many cases the canvas or hessian support was not made up of one piece but of one main piece extended by the addition of an extra canvas section stitched on to achieve the required size. Over time the two separate pieces can react differently to atmospheric conditions. The stitching rots and the join becomes visible on the paint surface.
 |
|
 |
Sometimes the hatchment suffers further damage through inexperienced handling when repair work or redecoration is carried out inside the church. Holes, tears, paint drips and even bird droppings often go unnoticed until the hatchment is removed from the wall and examined some years later. Nevertheless, in spite of such neglect, poor conditions and inexperienced handling, many hatchments have still managed to survive with surprising resilience.
Appropriate conservation and restoration work to a hatchment only begins after a thorough examination, which includes tests of the dirt, varnish, paint, ground layers and support. A full record of the work is kept, including photographs, and every stage of the work is logged in detail.
The first process is to stabilise any flaking, cracked or loose paint. This might involve applications of a stable adhesive with a small brush or injections beneath the paint. Dry, loose dirt from the canvas backing, often including old plaster or stone dust from the church wall, can then be removed. At this point, the paint surface can be gently cleaned, beginning with the removal of years of compounded dirt.
The removal of a discoloured varnish layer, where present, is carried out with a solvent or resin gel formula based on previous tests to the varnish.
An unvarnished painting, even of some age, can be highly sensitive to the materials used in cleaning. It is well understood that care must always be taken in preparing formulas for removing dirt or varnish from the surface of paintings. Even paint surfaces that have been hardened for many years can be irreversibly harmed by using the wrong materials, or even by misusing the right ones.
When the canvas is badly torn at the edges or is generally dilapidated, the hatchment might require lining with a new canvas support. If this is the case, a protective tissue facing is adhered to the paint surface and the canvas is unpinned from its flat frame. In order to consolidate the ground and paint layers when cracking and flaking has occurred, the hatchment is impregnated from the back with a liquid adhesive, usually applied warm, and a new canvas is adhered over the old one under gentle vacuum pressure and on a specially constructed heated table.
The lined hatchment is then fixed to a newly constructed expandable loom or stretcher and the protective facing is removed. At this stage, missing areas of paint and ground layer from any holes and tears are filled with specially mixed filler to match, where possible, the original ground. These new fillings are then retouched to match the surrounding paint. For future protection, the hatchment is then varnished with a non-yellowing resin.
 |
|
 |
|
 |
|
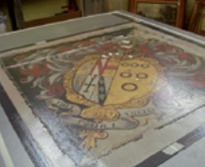
| The Kirklington hatchment lining under vacuum during restoration (top), and (centre and bottom) the front and back of the finished work |
Tacking the canvas to the frame, as was usual in the past, is unsuitable for historic and fragile material, so a rebate has to be made to accommodate the lined hatchment on its new stretcher. Attaching battens to the back of the frame not only allows the fitting of the new stretcher but also helps strengthen the frame, which will be expected to carry the extra weight of canvas and stretcher.
Frames that hang diagonally, as framed hatchments do, can become weakened at the corners. New weight to the frame obviously can exacerbate this. In some cases the frames are so badly damaged by woodworm and other environmental effects that they have to be replaced with a new frame specifically designed to match the old, although where possible the original should be conserved.
In general, when a parish has commissioned a hatchment to be conserved, the building will already have been repaired and damp or leaking roofs fixed. However, a protective backing to the hatchment should still be fitted, since plaster and dust have a tendency to collect in the lower edges of the stretcher behind the lined canvas, eventually creating bulges in the face of the painting and causing future damage. New wood blocks should also be fitted at the corners on the back of the frame in order to ensure a free flow of air between the hatchment and the wall.
How best to re-fix the hatchment to the wall is also a consideration. More often than not, the hatchment will have been hung in the church from a heavy hook driven in high up on the wall. With any extra weight, the conserved hatchment and its frame would require better support. This has sometimes been achieved by screwing the corners to the wall but this can lead to restriction of the wood and possible warping and splitting at the pinned corners. It is best to use an angled (90°) supporting bracket which can be screwed to the wall allowing the bottom corner of the frame to slot into and be supported by the V, while the top corner is held by a wall hook. A chain is fixed between the top corner of the frame and the hook so that the hatchment can be angled to deflect falling dust from the paint surface and make it easier to view from ground level. This type of fixing should be considered when replacing the hatchment on the wall: it will help to ensure that it is both preserved and appreciated, hopefully for many years to come.