Timber Floors
Jasper Weldon
 |
|
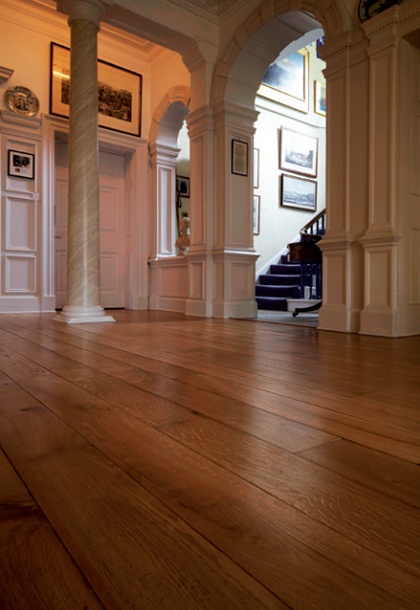
| Antique oak boards, Burgage Manor, Southwell, Nottinghamshire |
Many wooden floors have been lost to the ravages of time and the vagaries of fashion. Changing trends have seen beautiful timber floors buried beneath layers of treatments and finishes. Floors have been crudely carved up to make way for modern services, while expenditure on maintenance and repair has been governed by the rise and fall of personal fortunes.
By the time a 200-year-old oak floor has been stained by the Victorians, neglected by a property owner who has fallen on hard times, chopped up by a plumber and coated in years of dust and dirt, the timbers might appear unsalvageable, even worthless.
On building projects it is common to find timber floors which have been ignored because they are considered to be beyond restoration. With sympathetic treatment, however, almost all historic timbers can be restored beautifully to become the foundation of an authentic building restoration.
Much like a piece of antique furniture, once wooden floors reach a certain age they all have an inherent beauty and value that merits investing the time and effort it takes to revive them. A floor that has passed the age of 100 years is certainly worth saving, whatever the wood. Indeed, the pine imported from the Baltic throughout the 19th century was from first-growth forests, and has a quality that it is now very difficult to match. Today, those late Georgian and Victorian pine floors look beautiful by virtue of their age.
Basic dating techniques using easily recognisable clues can help practitioners and project managers identify valuable pieces of our heritage that deserve to be salvaged. Ironically, the most obvious indicators are signs of damage and interference. Often the greater the damage to a floor, the greater the probability that it has been down for a very long time. Throughout the 20th century, many beautiful timbers were pulled up casually and carelessly to make way for central heating systems. During the 1940s and 1950s large tracts of flooring were taken up in many houses to allow the installation of asbestos lagging around under-floor pipework. Although this practice was phased out in the 1960s, invasive asbestos surveys since then have led to more destruction with floors taken up to remove the offensive material.
The more empirical method of ageing a floor involves close examination of the building style and of the location, style and construction of the floor. This body of evidence should reveal whether or not the floor was part of the original building fabric (see the historic flooring table at the bottom of this page). If the clues lead you to the conclusion that you are standing on timbers of historic significance, it is very important to consult a conservator.
VARNISHES, POLISHES AND GRIME
Stripping back the layers of a very old timber floor without the aid of an industrial sanding machine can seem like an impossible task. But sanding is the harshest treatment you can submit a wooden floor to and it is a process that conservators will avoid where possible. Sanding destroys the invaluable patination that wood develops over years of wear. Preserving patination should be approached in the same way as with a fine piece of antique furniture. First, you must carefully strip back the layers of grime with turpentine and the delicate use of wire wool and a cabinet scraper. Then, once cleaned up, natural waxes should be used to enhance the natural colour and grain and to seal the aged wood.
 |
|
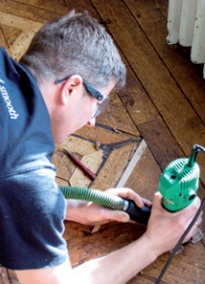
| Craftsman repairing a parquet floor | |
 |
|
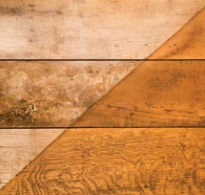
| Restored Georgian oak boards | |
 |
|
| Restored Victorian pine boards |
The choice of wax should always be dictated by the volume of traffic the floor will need to cope with. For high traffic areas, a floor polish with a high content of carnauba, a harder-wearing wax derived from the carnauba palm of Brazil, is the best option and should be mixed with a good quality beeswax. For lower traffic areas a good quality beeswax will suffice.
Lacquers and varnishes, which generally contain polyurethanes, tend to give the wood an orange, ‘plasticky’ appearance and should always be avoided on antique floors.
SHRINKAGE
Large gaps between boards are not just draughty, they are indicative of an overall change in humidity at some point in the lifetime of the floor. Often this will have occurred following the introduction of central heating. Where historic fabric is concerned, it is always best to avoid altering it, and there will be cases where a floor is too precious and the gaps too small to justify any alteration. However, where the gaps affect the performance of the floor, some intervention will usually be justified.
One option is to fill the gaps with purpose-cut timber fillets. This is the least favourable option because it inevitably detracts from the original character of the floor. The other option is to lift and re-lay all the boards and fill the remaining gap at the side of the room with a replica board in matching antique timber. This is the most effective and aesthetically pleasing solution as the alterations are almost impossible to distinguish from the original floor. The lifting of the original floorboards has risks attached as far as damage is concerned, so it must be carried out carefully and by experienced contractors to minimise the risk.
CUPPING
Changes in humidity can also lead to the curving upwards of the edges of the boards. This cupping occurs when the ambient humidity on the top side of the board differs from that of the underside, normally caused by damp from below the floor structure. Typically, people tend to resolve the problem by sanding the warping out of the boards. In the long run this is not the solution since it cures the symptoms and not the cause. Humidity problems need to be resolved first, and only then can the boards be returned to their original shape. In sanded boards this would produce a downward turn as the boards dry out.
Where cupping is caused by damp, the damp should be addressed first and foremost, not least because it could be causing other damage to the fabric of the building. Ideally, the boards should be lifted carefully out of situ, dried out in a climate-controlled environment so they regain their original shape, and re-adjusted to the new humidity of the dry and damp-proofed room.
DAMAGED TIMBERS AND POOR REPAIR WORK
While there are countless examples of poor repair work to timber floors there are few that cannot be resolved with clever craftsmanship. Whole boards, parquet panels and marquetry borders can be replaced with matching antique timbers. Replacement sections can be spliced in, missing components can be reconstructed and bad filling can be rectified. Where the substrate has failed, leading to the disintegration of the overlying timbers, the floors may have to be lifted, reconditioned and reinstalled over an entirely new substrate.
CLEANING AND POLISHING
Water should never be used to clean wooden floors. Washing with water tends to strip back polishes that have been applied and leave grey streaks across a floor, not to mention the harm that it does to the wood. The simplest routine for keeping wooden floors clean is wiping them with a slightly damp cloth to remove heavy dirt before buffing with a natural wax.
There is a multitude of modern floor polishes on the market, most of which are inappropriate for use on an antique floor. As stated, natural carnauba and beeswax polish from a specialist supplier is arguably the best solution for a heavily trafficked floor. Ideally, floors should be buffed weekly and polished thoroughly three times a year.
Ultimately, three golden rules hold the secret to the successful restoration and care of beautiful wooden floors. Abide by these and you are half-way to preserving what can be one of the most rewarding parts of a restoration or conservation project.
THREE GOLDEN RULES
- Always seek advice from an expert before allowing other trades to work in the building
- Where possible, avoid the use of heavy sanding equipment
- Do not use water to clean the floor
HISTORIC FLOORING TABLE |
|
TUDOR & JACOBEAN (1485-1625) BAROQUE (1625-1714) GEORGIAN (1714-1811) REGENCY (1811-1837) |
VICTORIAN/ARTS & CRAFTS/ART NOUVEAU EDWARDIAN (1901-1914) 1920s & 1930s (ART DECO, MODERNISM, etc) |
~~~