BCD SPECIAL REPORT ON
HISTORIC CHURCHES
21ST ANNUAL EDITION
37
many scholarly pattern books featuring designs
suitable for stencilling such as Owen Jones’
The Grammar of Ornament published in 1856
and Polychromatic Decoration by W&G Audsley
published in 1882, so there was no shortage
of inspiration for architects and decorators.
Stencilled decoration developed broadly in
tandem with the Gothic Revival and reached its
peak of refinement around the turn of the 20th
century. Depending upon the date and setting,
mural decoration varied from simple ‘stoning
and roses’ – stylised masonry patterns in earthy
reds and ochres – to the most sophisticated
multi-coloured schemes incorporating gilding,
figurative subjects and complex symbolism.
In addition, reredoses, screens, organ pipes
and cases, ceiling panels and roof timbers
were all frequently embellished with stencilled
decoration to emphasise their significance
and disposition in the interior of the church.
In the golden age of Victorian religious
conviction and imperial affluence some
churches may have been completely redecorated
every generation or so as fashions changed
and the existing work began to look shabby.
Sometimes two or even three decorative
schemes lie one on top of the other. However,
by the turn of the 20th century reaction to
this was beginning to develop as may be seen
from the strictures of the noted churchman
and writer Percy Dearmer in The Parson’s
Handbook, first published in 1899:
Stencilling is only an improvement
when used with great reserve and by
an exceptionally competent artist; it
is safer to avoid it… The walls should
be completely whitened, right up
to the glass of the windows, and so
should the tracery and arches...5
After the first world war there was widespread
must have the centre held in place). The skill
is for the bridges to be incorporated as an
integral part of the design. Done well, this
produces naturally elegant patterns and the
bridges go unnoticed. Otherwise a great deal
of time can be spent painting out the gaps
left by the bridges in the stencilled image.
Setting out is the next important step.
For example, to embellish a moulding with
florets, a stencil of perhaps four florets might
be used. The distance from the last floret to
the end of the plate would be the same as that
between the florets, so each time the plate
is moved along the design is self-spacing.
If stencilling a large area of wall, it should
first be marked out with a grid of chalk or pencil
lines to show the position of each repeat of the
pattern. The stencil plate is then fixed in the
first position using pins or tape. The stencil
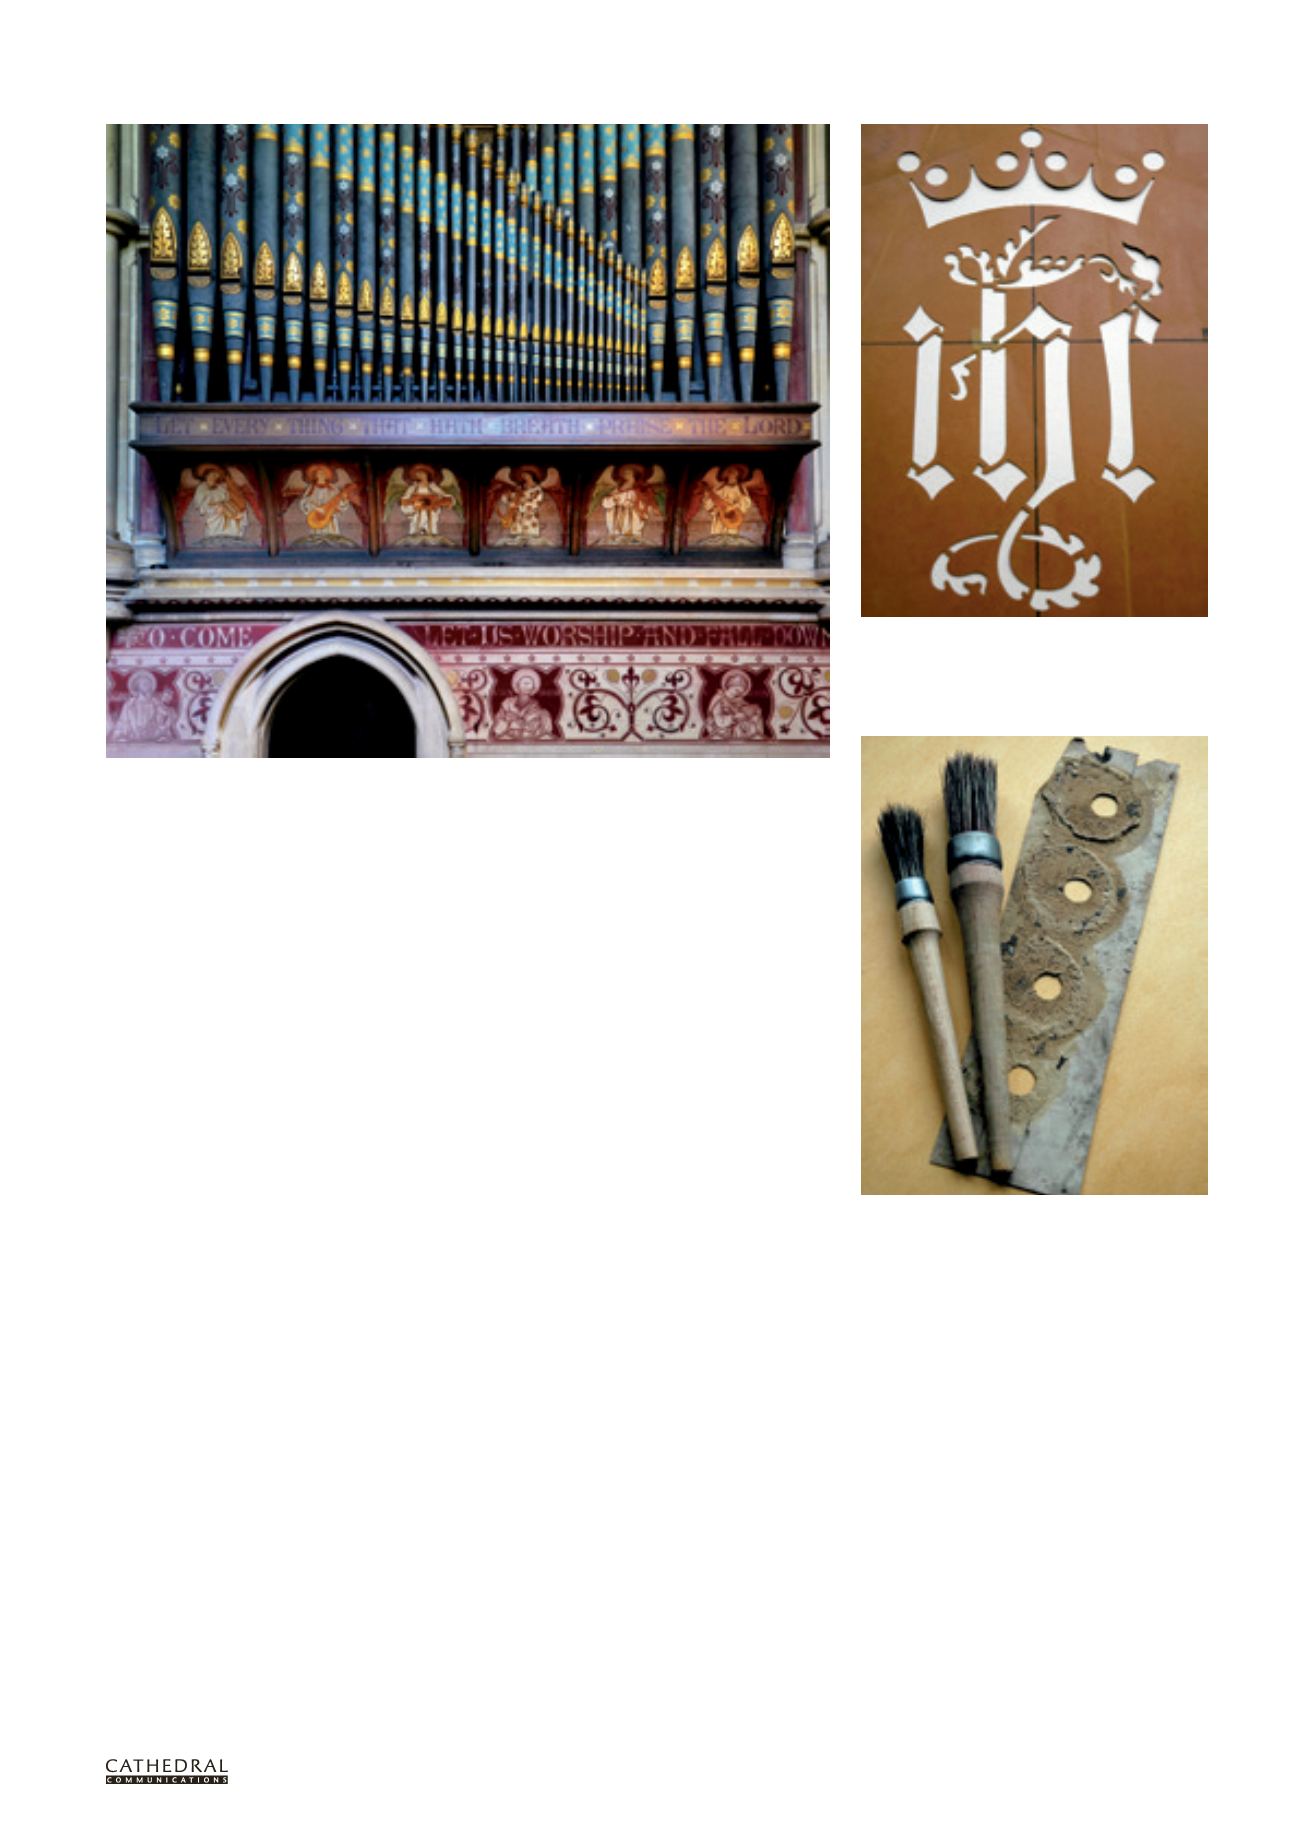
Modern stencil brushes and a Victorian paper stencil.
The paint has built up thickly on the stencil plate
from repeated use. (Photo: Kevin Howell)
IHS stencil used in the restoration of the Lady Chapel,
St Matthew’s Church, Westminster in 1984. The black
lines are used to position the stencil correctly and
the number of bridges to be painted out are kept to a
minimum. (Photo: Kevin Howell)
Stencilled and freehand frieze in tempera, with oil-painted organ case above; St John the Evangelist,
Sutton Veny, Wiltshire, by JL Pearson 1866–8, with decorations by Clayton & Bell (Photo: Jonathan Taylor)
disillusionment with the certainties of a
previous age. Gothic architecture in general
was becoming unfashionable and there was
little inclination to spend scarce money on
embellishment. As decorative schemes started
to show their age, increasing numbers were
painted over or removed entirely. Although
the use of stencilled decoration has continued
to this day, the scale and sophistication
achieved at its peak in the late Victorian and
Edwardian eras have never been matched.
TECHNIQUES ANDMATERIALS
Stencilling consists of applying paint to a surface
using a stencil ‘plate’ to create an image, which
can be positive or negative. Many materials have
been used to make stencil plates: sheet lead,
copper, brass, parchment, card, paper, and in
more recent times, plastics. Almost anything can
be used as long it is relatively easy to cut, and
thin and flexible enough to lie in close contact
with the surface, thus preventing the paint from
creeping under the edges. Likewise almost any
paint, dye or stain can be used as long as it is
not too thin, so it does not run under the plate.
For architectural decoration in the 19th
century, card or paper was generally used
for stencil plates. The material was readily
available and cheap, easy to draw on and
to cut. Stencil brushes for applying the
paint were usually round with the bristles
formed into a stubby cylinder shape.
As with most crafts, individuals would
vary their technique to suit the job in hand,
but the general procedure was much the same
as it is today. The design is drawn onto the
stencil plate and cut out with a sharp, pointed
knife. During cutting, ‘bridges’ or ‘ties’ are
left to hold the various parts of the design
together (for example, a letter ‘O’ stencil


