


 96 / 196

9 6
T H E B U I L D I N G C O N S E R VAT I O N D I R E C T O R Y 2 0 1 6
T W E N T Y T H I R D E D I T I O N
3.2
STRUCTURE & FABR I C :
MASONRY
Advantages
• superior joint finish
• uniformity of colour and strength
• greater choice of joint finishes
• clean face work
Disadvantages
• increased labour and material costs
• additional construction time
• if incorrectly executed the
compound joint may fail to unite
• requires skilled and experienced pointers.
AIMS
There are two principal reasons for finishing
the external joints of brickwork:
Structural
Even when properly dampened
before laying or pointing, bricks absorb
moisture from the mortar. Along with
evaporation, this results in partial de-hydration
of the joint towards the joint face. So the action
of the jointing tool consolidates the surface
of the joints closing up shrinkage cracks and
protecting against the ingress of driving rain.
Aesthetic
Jointing or pointing, especially
the latter, when executed according to
the historic traditions of the craft, are
highly-skilled operations. Well jointed or
pointed brickwork will be uniformly and
precisely finished, no stains will mar the
facade and the finished joints will not be
obtrusive. The observer’s eye must never
be drawn to the joints but, rather, to the
overall brickwork and to features such
as arches and decorative mouldings.
Inadequate modern training means that
most bricklayers today lack knowledge of
traditional tools, equipment and materials,
and haven’t received the proper level of
practical tuition necessary to develop these
all-important skills, which at their highest
expression are an art. Their work often
involves the wrong mortars, including
those based on cement (ordinary Portland
cement). OPC, being hard, inflexible
and dense, is wholly inappropriate for
traditionally built brickwork in soft, flexible
and porous lime mortars and can cause
the bricks themselves to deteriorate. The
use of cement-rich mortars is generally
ill-timed, heavy-handed and neither true
in style or execution, all of which means
that many fine facades of historic brickwork
are marred or irreversibly ruined.
Colour washing
Until the 19th century,
when developments in kiln technology
produced bricks with a fairly uniform colour,
most premier facades were dyed using
natural earth pigments such as ochres to
regularise uneven brick tones. When brick
colours were largely orange to red this was
frequently referred to as ‘ochering’, ‘raddling’
or ‘ruddling’, but as buff-coloured bricks
became fashionable the term ‘colour washing’
was adopted. The term should not be confused
with lime washing: a colourwash does not
contain lime. Typically, the earth pigments are
mixed in small (weak) ale and/or glue size to
help it adhere. Alum (potassium aluminium
sulphate), or ‘white copperas’ (zinc sulphate)
is used as a mordant to ‘fix’ the pigment and
make it weatherproof.
Pencilling
If jointed, colour washing
results in the joints being coloured too,
so these were always picked-out again to
re-emphasise the bond, but always to a
lesser scale, through a craft practice called
pencilling. This was usually executed in white
distemper – a mix of crushed chalk (whiting
or whitening) and glue size, although black or
red pencilling is occasionally seen. Pencilling
was frequently applied free-hand with a thin
brush until the beginning of the 17th century.
Thereafter, during a period characterised by
refinement, the application of pencilling was
guided by a straight-edge, or rule.
As tastes changed and brick quality
improved, some designers preferred the
natural colours of hand-picked bricks for the
facades, so pencilling was sometimes applied
to joints on facades which were not colour
washed, resulting in just a thin white line in
the groove of the joints.
HISTORIC ENGLISH JOINT FINISHES
Flat joint
This is also termed ‘flush’ as the joint is
finished level to the brick faces. During the
17th and 18th centuries this was frequently
smoothed and after colour washing the
facade, joints were neatly pencilled, guided
by a rule. This work can be mistaken for tuck
pointing. Some designers used it during the
Arts & Crafts period, rubbing the suitably
stiffened surface of the joints with a hessian
sack to raise the aggregate and give a rustic
appearance that led to the name ‘bagged joint’.
The technique was derided by highly-skilled,
London pointers as the ‘Westminster Smear’.
Struck joint
The craft term for inclining a joint finish is
‘striking’. During the 15th century some joints
were crudely ‘struck’ when jointing with
the trowel by inclining the finish of the bed
joint in towards the upper arris of the lower
brick, so the lower edge was slightly recessed.
The technique developed as a way of hiding
variations in brick shapes: the top of each
course of bricks was carefully ‘lined-in’ by the
bricklayers, but the lower edge was irregular
as a result. Striking emphasised the straightest
edge and helped to hide the more uneven
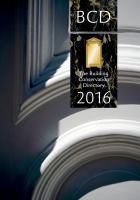
Some of the main historic joint profiles
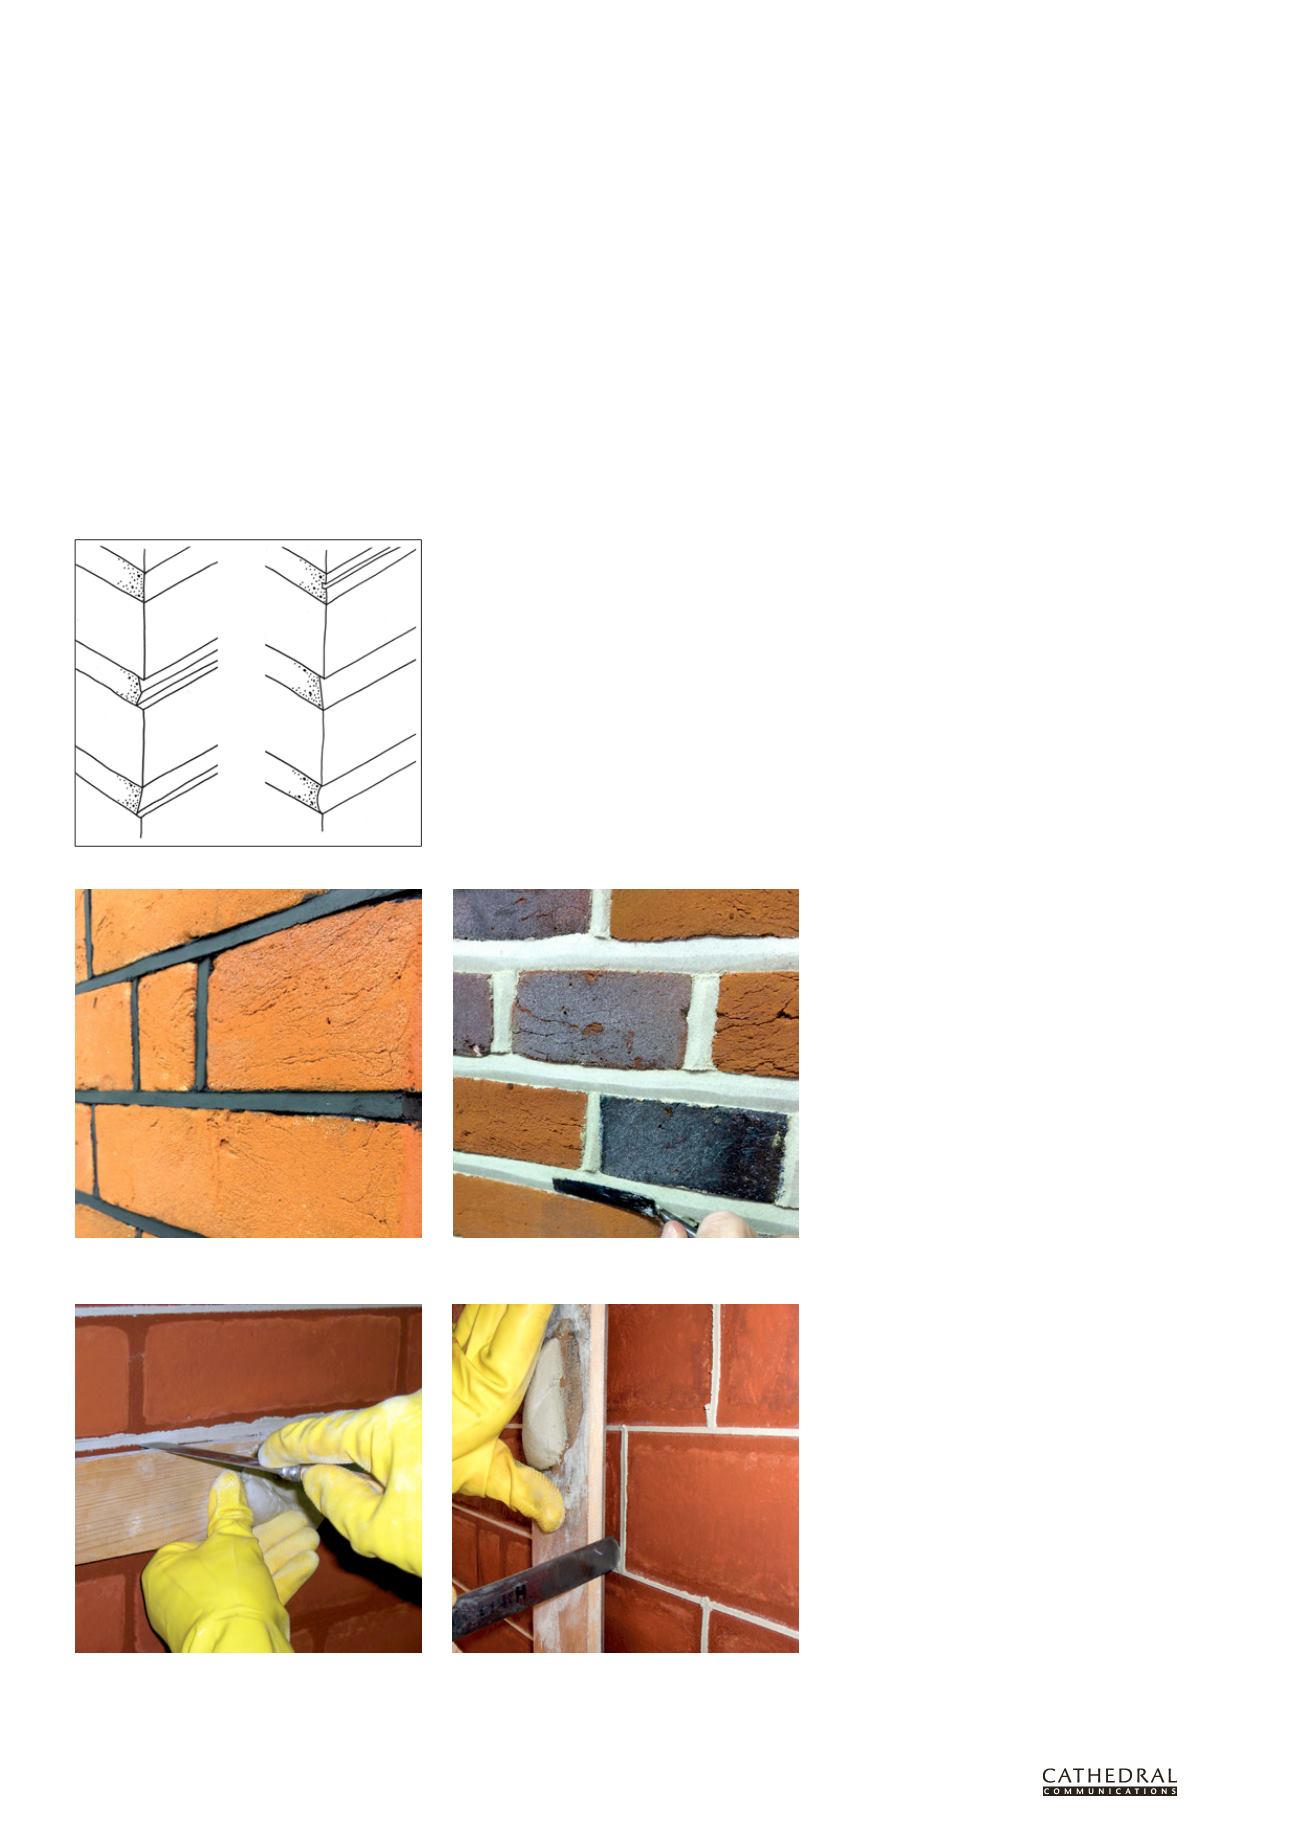
Pigmented black ‘weather-struck and cut’ pointing
(All images and examples on this page by the author)
Applying a ‘double-struck’ profile to a bed joint
Using the adapted knife or ‘Frenchman’ to trim a bed
joint ribbon during tuck pointing
Using the adapted knife or ‘Frenchman’ to trim the
joint ribbon of a perpend during tuck pointing
Flush
Ruled
Double-
struck
Weather-
struck
Overhand-
struck
Keyed