


 168 / 208

1 6 6
T H E B U I L D I N G C O N S E R VAT I O N D I R E C T O R Y 2 0 1 5
T W E N T Y S E C O N D E D I T I O N
INTER IORS
5
to be decorated had to be carefully prepared
to present a very smooth surface. The
preparatory layers of priming and ground
layers would consist of a drying oil binder
(usually linseed oil) and pigments such as lead
white, rubbed smooth once dry.
Grounds also had a colour function
and would influence the appearance of the
translucent patterning paint. The majority
were off-white but a few, such as
vert de mer
(a dark marble with green veins) and
‘
black
and gold
’
(a black marble with gold veins
such as Porturo), would have a dark colour
ground. Paradoxically, recommendations
for some dark marbles suggested a light
ground, so the techniques can be carried
out as light over dark or dark over light.
The surface of the ground would be worked
over (or
‘
clouded
’
) using either well-diluted
opaque or naturally translucent pigments in
order to create irregular and varied patches
of colour, copying the natural appearance of
the marble.
Any visible brush strokes would be
softened with a badger-hair brush. The
shades of the principal colour were applied to
look
‘
either like lumps, veins or plain spots,
intersected here and there by dark, lighter
or white veins
’
. The correct application was
clearly a skilled job despite its deceptively
natural appearance. Van der Burg comments
‘
the paint is loosely put on in a rolling way;
the more freely and artlessly this is done, the
better it will serve the purpose
’
.
A variety of brushes were used: the
‘
spotting or marbling
’
brush, flat
‘
French
’
brush, round
‘
mop
’
brush, sable brush (or
pencil brush), glazing brush (a wide but thin
brush) and a flat, long-badger-haired brush
serving as a softener. The broad veins were
put on with the flat French brush or the
glazing brush, the finer veins with a sable
brush, gently softened to one side with the
badger brush, giving the effect of one hard
and one soft edge to the veins. Van der Burg
also describes an interesting technique where
the marbling brush is dipped in turpentine
and pressed out on the edge of the cup so that
its bristles are splayed, the brush was then
dabbed into sequential colours on the palette
so that
‘
with one stroke these different tints
may be laid on sharp or flowing
’
.
Techniques such as spotting (covering
both light and dark parts with spots of
diluted paint) allowed the marbling to be
subtly augmented and the softening brush
was used to ensure that no unintended
hard edges were present. Once these had
dried hard, a glazing coat of paint ground
in oil and well diluted with turpentine was
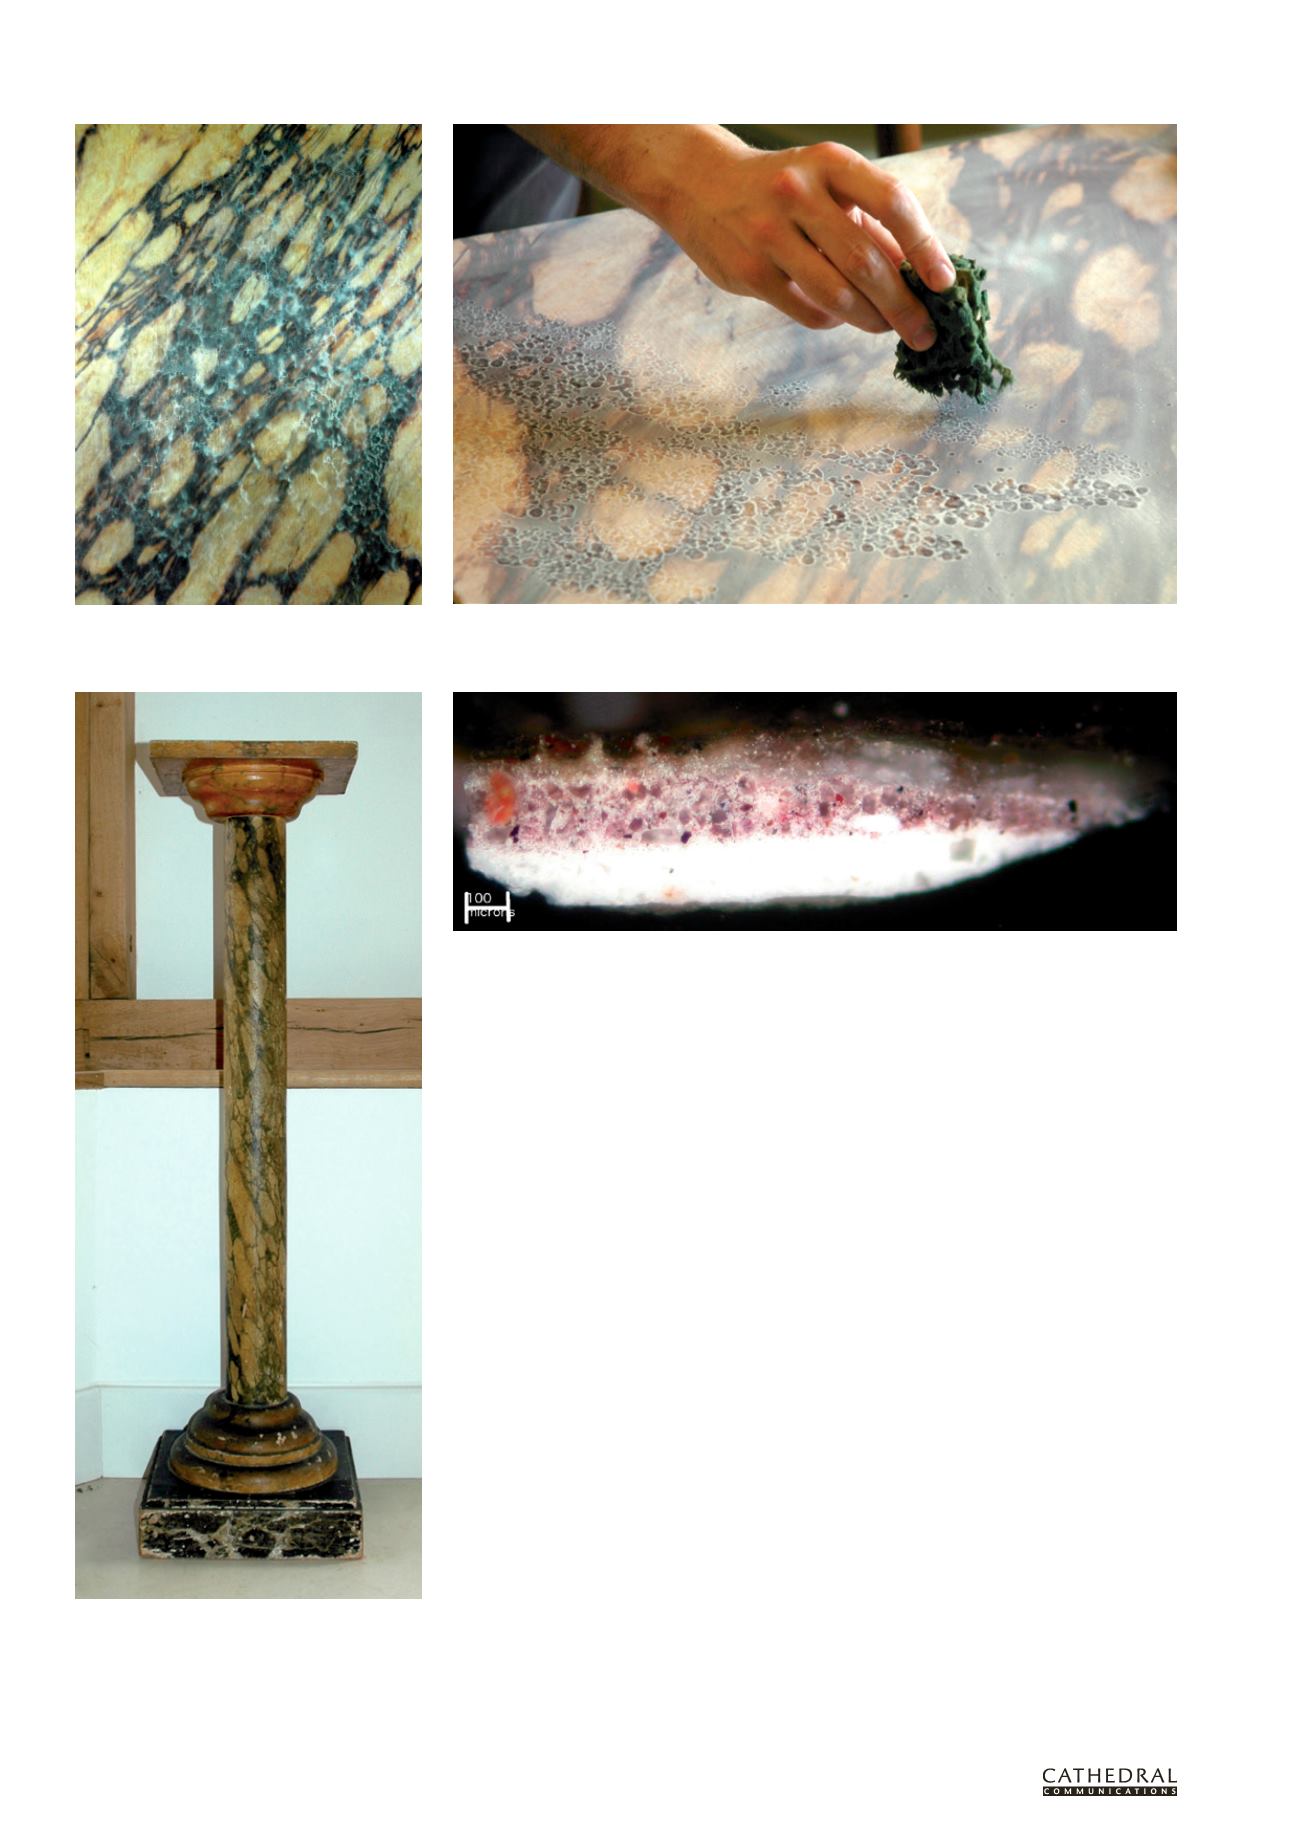
A recently painted example of Brèche violette showing
the typical dark purplish broad veins and very fine
white veins worked over a pale cream ground
A brèche violette panel being worked with a sponge to modify surface glazing
A plinth dated to the late 19th century on stylistic
grounds: this is likely to be a demonstration piece
intended to display a range of different marble
finishes and may have been produced by an
apprentice painter as his masterpiece.
Paint sample from the imitation violet marbling on the shaft of the plinth. On the photomicrograph the off-
white ground, smooth on its upper boundary, is coated by a violet layer, modified on its surface by translucent
white glazes. A discoloured varnish layer is visible on the surface of the sample. Chunks of red lake and dark
purple
mortuum kaput
are visible.