


 59 / 208

T W E N T Y S E C O N D E D I T I O N
T H E B U I L D I N G C O N S E R VAT I O N D I R E C T O R Y 2 0 1 5
5 7
2
BUI LDING CONTRACTORS
surfaces, hand-placing the concrete may be
adequate (Figure 4).
The shutters should be cut to size to
cover the repair area. For board-marked
concrete, rough-sawn wood (such as Douglas
fir) should be cut to match the height of the
original board marks. The boards should be
butt-jointed together and a foam strip (gasket)
applied around the circumference of the
repair patch (between the shutters and the
parent concrete) to prevent laitance seeping
out. By fixing hinges to the lower edge of the
top-most board, a letterbox arrangement
can be created at the top of the repair patch
to allow the repair to be filled. The shutters
should be coated with either a release agent or
retarders prior to use.
The best method of holding shutters in
place for smaller repairs is to use external
supports (Figure 6) although this is frequently
impractical. For larger repairs the shutters
need more substantial fixings to support the
weight of the repair concrete.
The next best method of supporting
the shutters is to use rock anchors that are
‘hammer fixed’ into the back face of the repair
areas with threaded bars to secure the shutters
(Figure 7). The threaded bars are removed
after the repair has set and the fixing holes
(which are now in the new repair patch) filled
in. Other types of fixings may be plugged
into the repair areas for smaller repairs.
Alternatively, shutters can be supported
outside the repair patch using fixings to
the parent concrete; however, this results
in additional holes in the parent concrete
that require filling afterwards. Additional
formwork may be required for complex repairs
(Figure 8), and for larger areas of repair steel
beams may also be required to support the
weight of the repair concrete, (Figure 9).
Placing the concrete
The specified mix of the concrete should be
selected from the slab library to match the
colour and texture of the particular area to
be repaired. A typical composition may be
1:2:3
(cement:sand:aggregate), mixed with a
water:cementratio of around 0:4. Additives,
such as styrene butadiene rubber (SBR) may
be beneficial in minimising the
water:cementratio while maintaining the workability of the
concrete repair, unless it is likely to discolour
the concrete. SBR also increases the bond
strength and provides water resistance to the
concrete repair.
The repair area should be suitably wetted
before the repair is made. The concrete should
be placed through the letterbox at the top
of the shutters (in batches) and a poker used
to vibrate the mix to remove air pockets.
This should continue until the mould is
completely filled. The repair should then be
left to set, typically for 12-24 hours, before
removing the shutters. The exact time depends
upon the environmental conditions (mainly
temperature), together with the thickness and
bulk of the repair. The time may be shortened
(early breakout) if the concrete surfaces
require finishing treatment.
If the repair is to be hand-placed, a cement
slurry primer should first be used on the back
of the breakout and the repair gradually built
up using a number of layers. Damp covers
should be placed over the repairs to complete
the hydration reaction.
Surface finish
Concrete repairs frequently produce a lighter
colour than the parent concrete as, until their
surfaces have weathered, they will not support
the algal or mould growth which darkens
‘aged’ concrete.
As a general rule it is recommended that
the original (parent) concrete should be left ‘as
is’ and not cleaned to match the new ‘brighter’
repairs. Previous assessments of ‘cleaned’
concrete have shown that it reverts back to
its ‘darkened’ colour in less than four years.
In addition, new repair concrete will itself
weather and its outer surface will become
carbonated (neutralised) and porous within
around 5-8 years. This allows lichen growth
to become established on the new concrete
within around 6–10 years.
Darkening of the new repair concrete may
be marginally increased by the use of growth
accelerators, such as live yoghurt or cow dung
(Figure 10).
If surface finishing is required to match
the exposed aggregate of an original finish or
a weathered surface, this is best carried out
soon after setting and before the curing or
hardening takes place. Simply rubbing with
hessian sacking or wire brushing may be all
that’s required to remove the cementitious
layer if the repairs are broken out early enough
or if retarders have been used. Alternatives are
to use a surface grinder, mechanical abrasion
or a high-pressure water jet (Figure 11). Damp
covers should be placed over the repairs
after the surface finishing to complete the
hydration reaction.
Surface coatings
If the historic concrete had originally
been coated then re-application is usually
appropriate. Otherwise, the use of external
masonry paints is generally frowned upon,
although they are sometimes used if graffiti
is a major problem, in which case specialised
anti-graffiti coatings are usually preferable.
Trials have recently been carried out on
the use of cement washes for graffiti-covered
or repaired historic concrete. This may be
a useful finishing technique for historic
concrete for listed residential developments.
Graffiti is first removed using chemicals
(generally solvents and non-ionic surfactants)
and the original concrete cleaned using high
pressure hot or cold water jetting (Figure 12).
This leaves a fairly patchy finish that is likely
to revert back to its original mould-covered
surface within a few years.
The trials involved applying a cement
wash (50% water by volume) which fills up the
pores in the weathered concrete and provides
a smooth clean finish without removing
the board-marked or other surface finishes
(Figure 13). This is analogous to replacing the
cement content in the weathered surface,
a like-for-like replacement. The success of
these trials allowed this particular finishing
technique to be used in the autumn of 2014 on
the concrete surfaces of a small park in a listed
residential estate in north London.
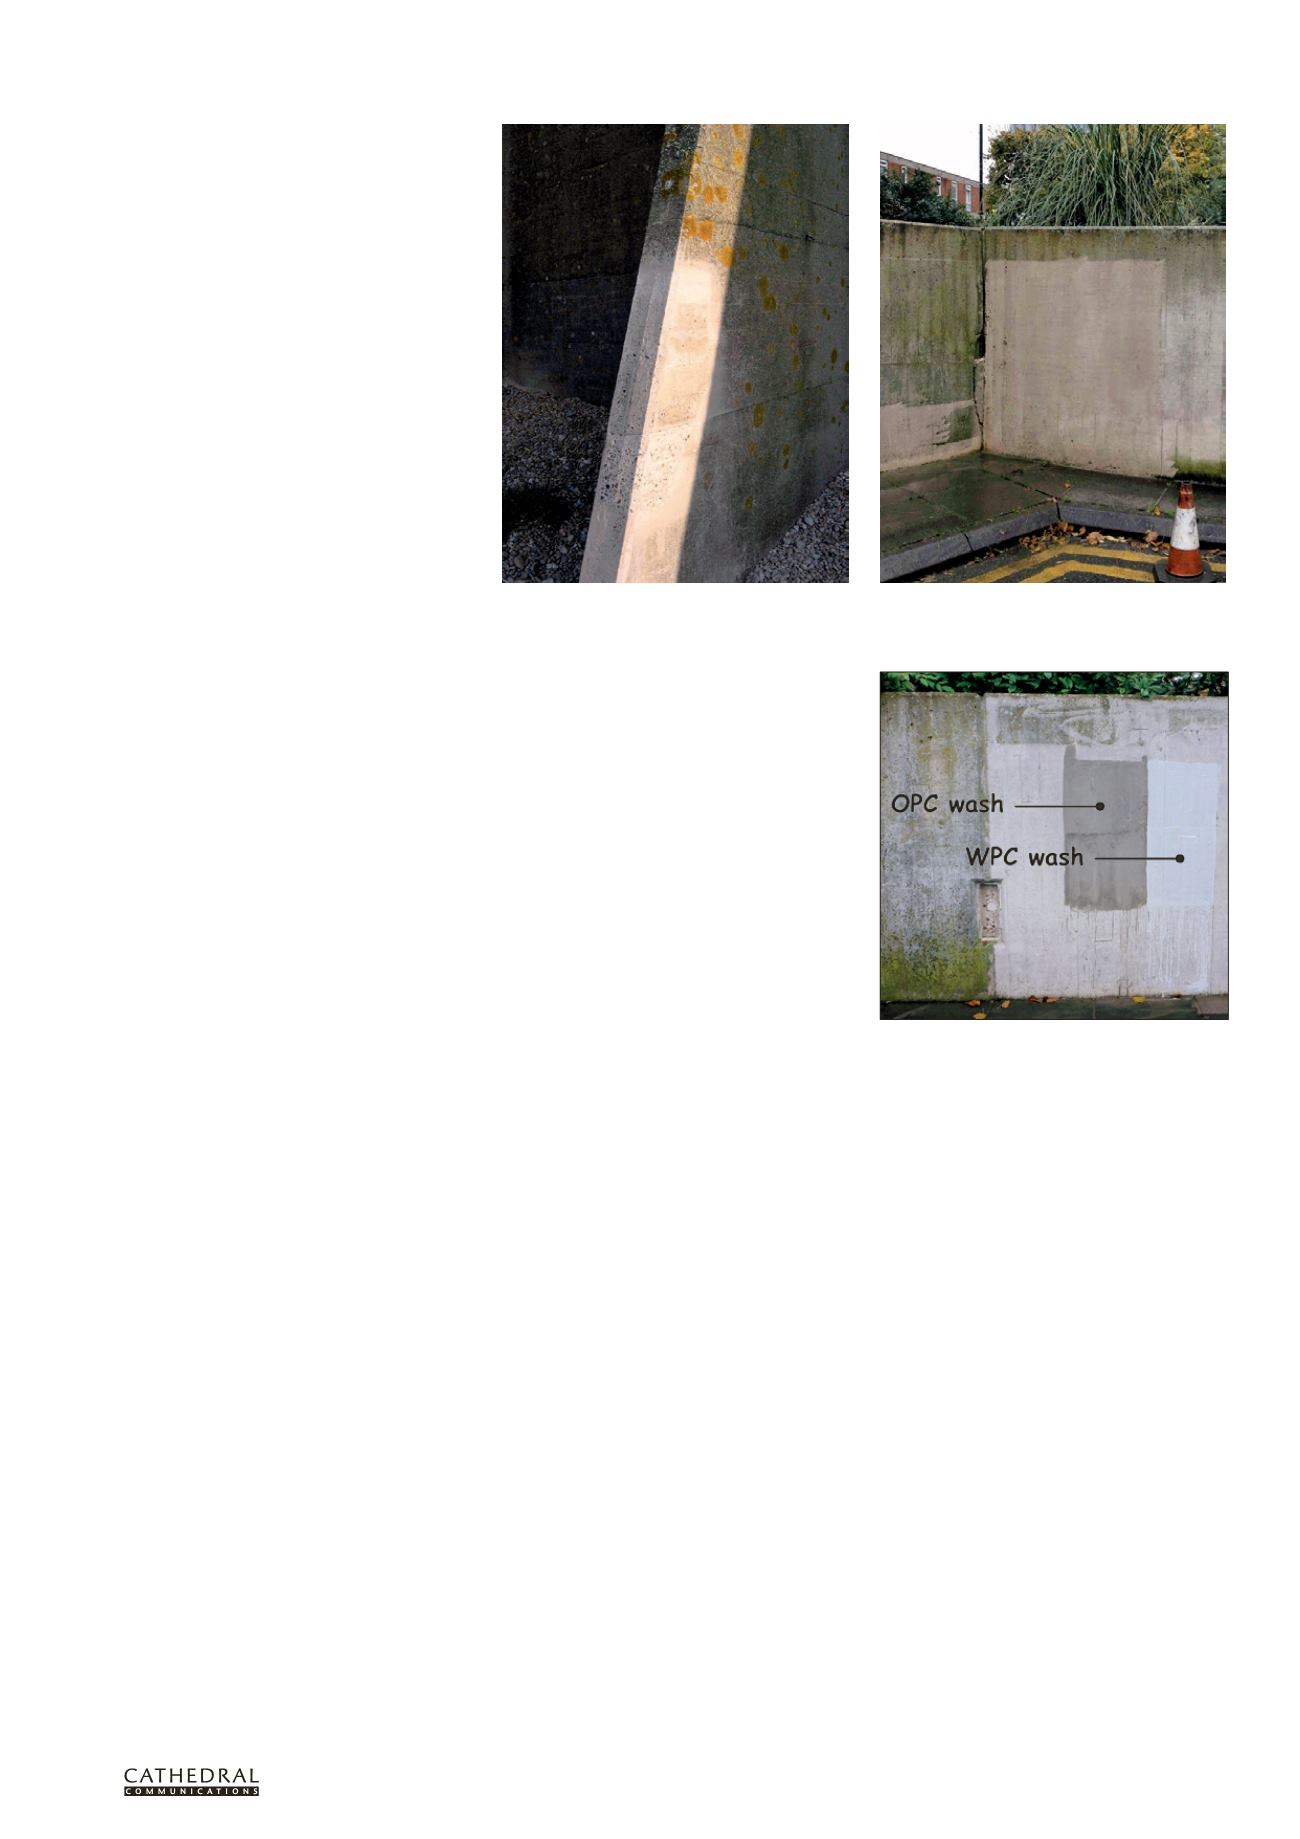
Figure 11 View of the repaired board-marked
concrete buttress: the lower section has been subject
to mechanical abrasion using the TORC process.
Figure 12 1970s concrete which has been treated with
graffiti remover and then high temperature jet washed
Figure 13 Cement washes (50% water by volume) on
cleaned concrete: left, OPC (grey) and right, WPC
(light grey)